GitHub Repo Setup
Github Repository Setup
This walks you through setting up a sync between your remote repository (the one on GitHub) and your local repository (the one on your computer). This walkthrough assumes you already have:
- Git installed on your computer
- A GitHub account
- A repository on GitHub for the course
- A folder on your computer for the course
If you don’t have one or more of those things, you will have to get them set up before starting this guide, either on your own or by contacting me.
If you have any problems with this walkthrough, please don’t hesitate to ask!
Steps to Sync
Step 1: Initializing your Local Repository
You need to first let the folder on your computer know that you are going to be turning it into a git repository.
Open the folder for your class in VS Code and open a terminal. You should now be in the correct folder; the last part of the path in the terminal prompt should match the folder name you chose for the class.
To start a git repository, enter into the terminal the command:
git init
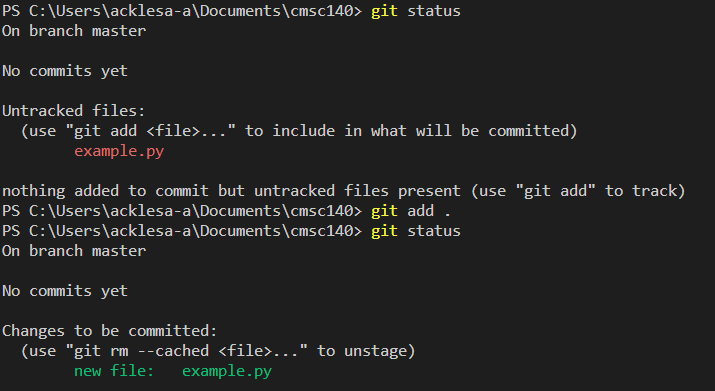
To test that your repository has successfully been created, you can check its current status with
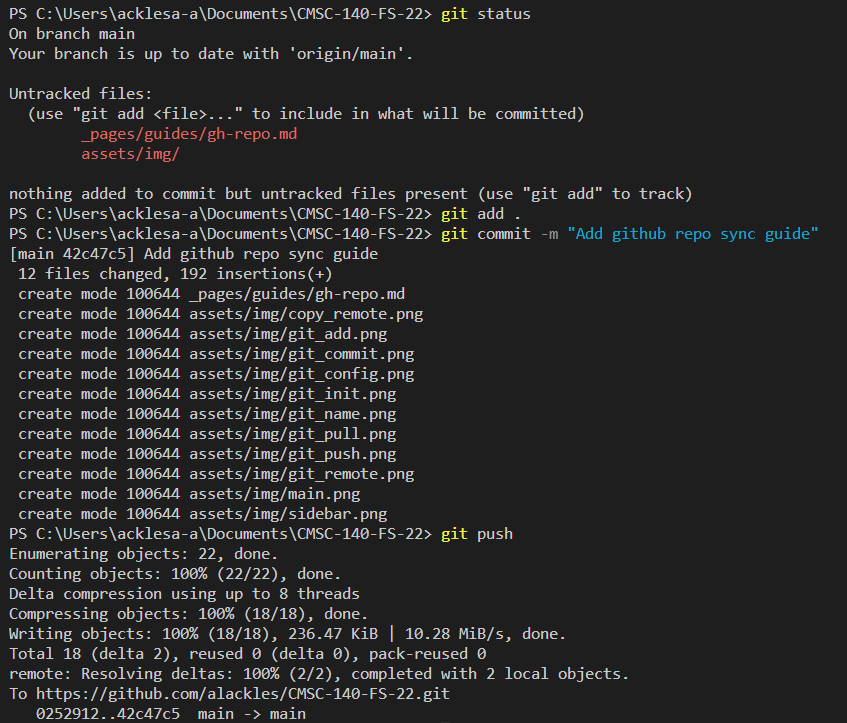
git status
It should look something like this.

Step 2: Adding your Local Changes
First, make sure all the files in your folder are saved. (If they have unsaved changes, there will be a white circle next to them in VS Code.)
Next, we are going to add all of these changes to our local repository staging-grounds. This basically means we know we have made changes to these files, and we want to store a version of them. We do this with:
git add .
The . is a command that means “everything in this folder and below”. You could also add files one-by-one using their names, or using folders.
Again, we can check the new status with
git status
To see that now there are changes “staged for commmit”.
Step 3: Committing your Local Changes
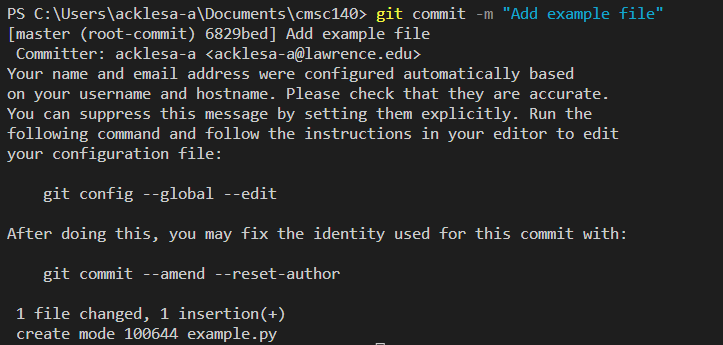
Now that we’ve told git we have changes that we want to save, we need to tell it to record that version by committing our changes. We also need a message to tell git what the commit is for.
The general format of this is
git commit -m "Your commit message here"
You can see how this works in the screenshot below.
You can try git status again to see what your new status is.
Step 3.5: Changing your branch name
This step MIGHT or might not be necessary for you.
Check your GitHub repository, the one you created online for the class. On the left, there is a button that will either say “main” or “master” with a down arrow.
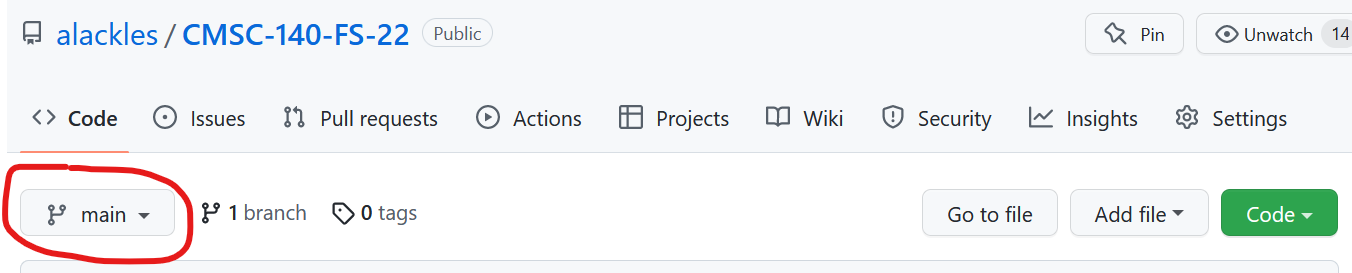
If it says master, you can continue to Step 4.
if it says main, you must enter in your terminal the following:
git branch -m main
Which will rename your local branch to main= and allow you to continue.

Step 4: Linking your Remote Repository
Next, we need to take the remote repository we created on GitHub’s servers and tell it that it should actually be linked into the local repository we’ve just initialized. This is similar to syncing apps across your desktop and your phone; no matter where you open Google Calendar, you always have the same tasks. No matter where you open this repository, it should be the same repository.
It’s a little different, of course, in that most apps will sync themselves whereas for your repositories you have to tell them when you want them to sync. But that just gives you greater control over what exactly you want to be saved.
To do this, go to your repository on github and copy the link to the repository. Note that you should use the HTTPS link, as we haven’t set up any other method.
This should be YOUR repository on YOUR GitHub account, not mine.
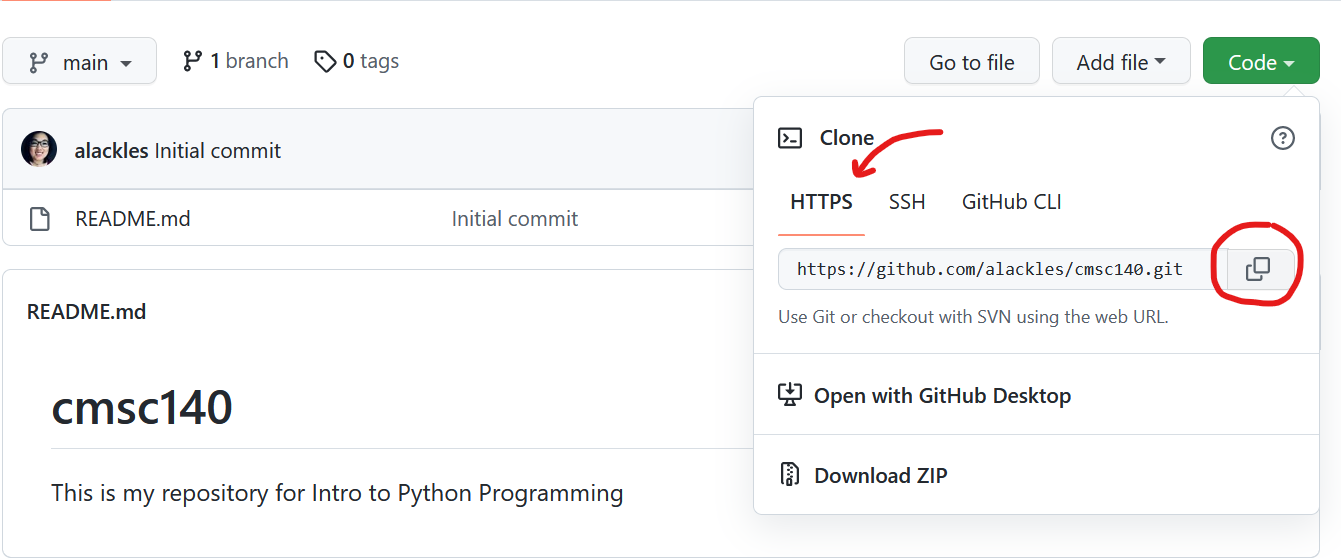
Next, we need to tell our local repository where to find the remote repository using this link. We do this with the remote add command:
git remote add origin <URL>
Where <URL> is replaced with your URL.
You can see what this looks like in the screenshot below.

The structure of this command is:
remote add: indicates that we want to link a remote repository to localorigin: the name that the remote repository should have on the computer. this could be any name;originis standard<URL>: the URL for the repository you want to add
You can check that this worked by simply typing
git remote
which should show just origin.
Step 5: Pull in Changes
Now that the local version is linked to the remote version, we can pull in all the information from the remote version into the local. This includes the README created by default.
This is called pulling, since we are pulling things FROM remote TO local.
Most of the time, we can do this sync by just typing git pull <remote-branch> <local-branch>. However, in order to do this the first time, we must let git know that we are aware that it’s the first time. We do this with an additional flag called --allow-unrelated-histories
So the full command is:
git pull origin main --allow-unrelated-histories
Next time we do a git pull, we won’t need that last flag, but I’ll remind you of that at the time.

Now you should be able to see your README.md from GitHub in your file explorer.
Step 6: Push out Changes
The opposite of a pull is a push. We want to be able to push files FROM local TO remote.
Note that a push only includes things that have already been committed. Anything that is at the git add stage or has not been added at all won’t be pushed!
The syntax for this is exactly the same as before for a pull:
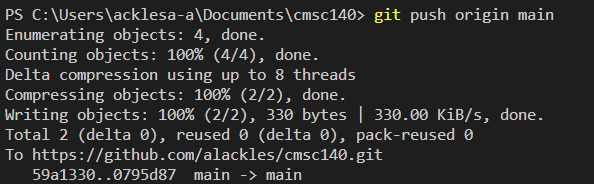
git push origin main
This time, if you are on windows, it will likely pop up an external window that will let you log into github. Use your same login credentials as when you created your account.
I am honestly not sure what happens on mac as I haven’t been able to test it. My GUESS is that it will ask you to enter your github username and password in the terminal. Enter the exact same information you would if you signed in on the web. Even if it doesn’t appear to let you type your password, it is taking inputs! It just won’t show the asterisks you’re used to.
At this point, everything should be synced, and we will be able to get more in depth with github when it’s time for final projects.
Step 7: Submit your Repo on Canvas
Don’t forget to send a link to your github repo for the 1st lab on Canvas!
A Note on GitHub Usage
With all this legwork to get setup, it might seem silly at this point to you to be using GitHub at all. After all, what’s the point of any of this? Why not just save things normally?
One major reason is that once you do the up-front work, it’s very, very easy to sync versions of projects. This is only first-time setup, after all. Once it’s done, it’s much simpler. Here, for example, is all of the steps I took to upload this entire guide to my course website:
Common Problems
As people inform me of what common problems they’re having, I’m going to add them to this guide so that we can all benefit from the collective troubleshooting power of 21 machines!